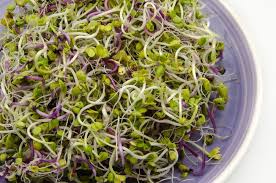
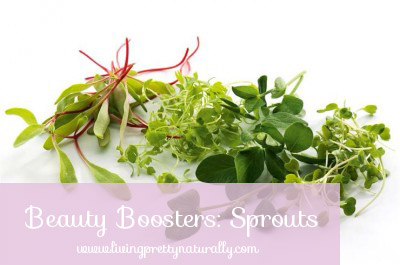
It is undoubtedly the easiest “gardening” you will ever do, and also one of the most nutritious. Sprouting is one of the most fantastic and easy ways to get a power punch of antioxidants, a host of beautifying minerals, enzymes and a wide spectrum of beauty enhancing vitamins – all in these tiny little plants.
Why are Microgreens & Sprouts Good for Me?
First let us try to understand what sprouting is. Sprouting takes a dormant seed, grain, nut or legume and “awakens” it by bringing it to life through moisture. This is the germination process. Once this has begun, the seed begins to become a living plant filled with easily digestible and usable vitamins, minerals and enzymes all of which can be used by your cells without overly taxing your digestive system. Essentially the sprouting process does the conversions of dormant nutrients into its usable forms (think dense proteins convert into simple amino acids).
The sprouting process also produces a great amount of Vitamin C (anti-aging properties galore) & the B complex (B2, B5 & B6) as well as Carotene (which converts to Vitamin A and is essential cellular repair & growth). Minerals such as iron, calcium, phosphorus, zinc and magnesium are also packed in these tiny little plants.
Aside from the nutrient benefits and their easily digestible properties, sprouts are also hugely alkalizing. Read more about the beauty benefits of an Alkaline Body here. So even though beans and grains are considered acid forming foods, they actually become more alkaline forming through sprouting.
What Can I Sprout?
Sprouts come in all shapes and forms: nuts, seeds, legumes and grains. The sky is the limit, really. The key is to start off with sprouts that are easier to begin with and then move your way up as you gain more experience. Some of my favourite sprouts include:
- Adzuki Beanss
- Sunflower Sprouts
- Broccoli Sprouts
- Cress Microgreens
- Lentils
- Chickpeas
How Can I Grow My Own?
The processes for growing Microgreens and Sprouts are slightly different; however, both are equally easy. Below I’ve given a step by step process of how I grew my last batch of Microgreens, and will explain how to use the same equipment to sprout after.
How to Grow Microgreens:
After you’ve picked up some sprouting seeds from your local natural food grocer, find yourself a sprout bag (if you don’t have one, you can also use paper towel for sprouting Microgreens) and a tray in which to sprout. I use a Sproutman’s Natural Hemp Sprout bag which you can find online here.
Now let’s get started!
- Disinfect your sprout bag by putting it in boiling water for 5 minutes – remove from water and lay flat on tray and let cool
- Remove enough seeds to widely cast over the wet sprout bag (or 2 wet paper towels)
- Cast seeds over sprout bag widely, & ensure the entire bag is wet, and that there is a little water in the tray (your seeds should NOT be under water, they need very little moisture to germinate).

- Watch them grow! Each morning put some water under the sprout bag (or papertowel) and ensure that the bag is damp (but not soaked). By day two they should look something like this:

- Continue tending to them each morning (or when you see the hemp bag is dry). Day three sprouts should have quite significant tails:

- Continue the process for approximately 4 – 6 days depending on the sprout you’re using. By day five my Cress was full grown:

- To eat, simply cut them off with scissors and put onto salads, soups and in your green smoothies.
- If you wish to harvest all your sprouts, you can cut them and store in an airtight container (around day six). Use paper towel to ensure there is no moisture in the container – this will quickly rot your sprouts.
How to Sprout:
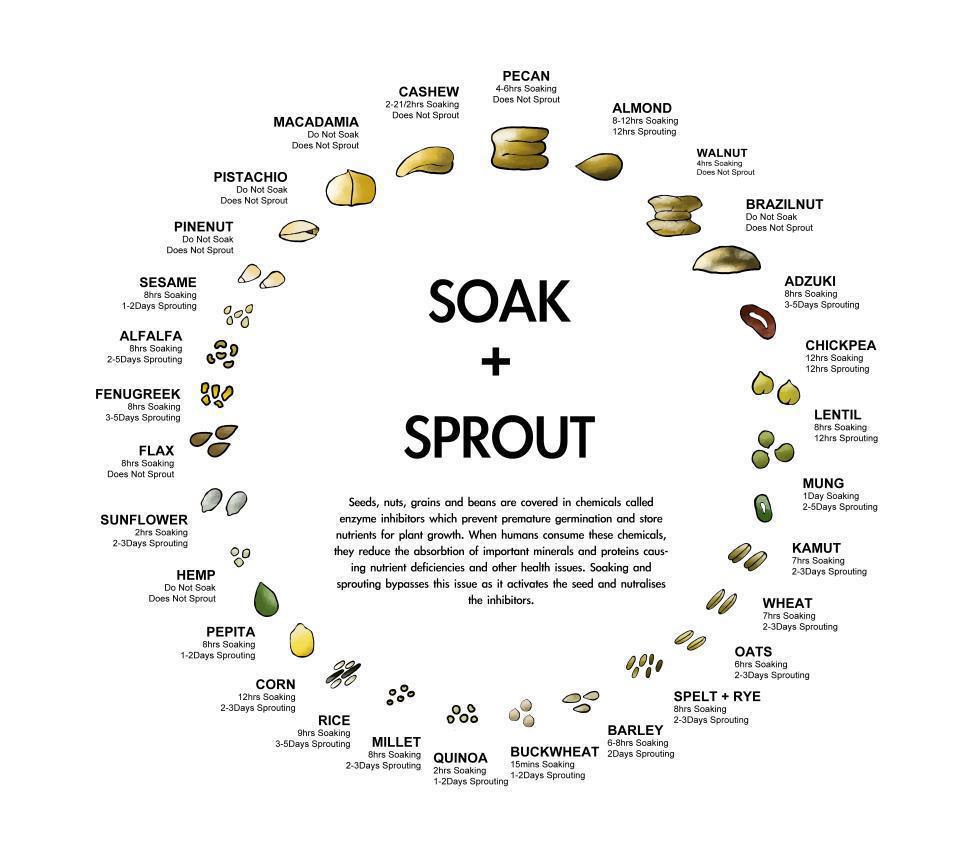
- Different from microgreens, legumes, nuts and grains will need a soaking – soak the desired seed or legume depending on its type in a glass bowl:

- Drain and rinse the soaked matter, and poor the soaked seeds into the wet & pre-disinfected sprout bag (disinfect your sprout bag by putting it in boiling water for 5 minutes)
- Close the draw string and then dunk the bag into a bowl of cool water for at least one minute
- Hang the bag on a hook or lay it on the dish-rack so it can drain
- Twice per day water them (dip for 1 minute in water) and hang
- Different Sprouts have different growing times, see above chart
- When you sprouts are mature, store the sprouts in the sprout bag right int he fridge or in a glass container (don’t use a plastic bag)
- Rinse the sprouts once every third day to keep them moist
- Sprouts should store up to 14 days, depending on the variety
Where to Buy Seeds & Sprout Bags?
You can usually find sprouting seeds at almost any natural food store. If you’re having trouble in your neighbourhood try your local plant nursery for some advice. If you’re still having trouble, the internet will rescue you with many resources including Sproutman and Sproutpeople. You can also find sprouting trays, sprout bags and other fun things as you get more creative with your sprouting.
Safety & Sprouts
When sprouting you should always be mindful of the potential to grow something not so healthy, namely bacteria and mold. It is important to always use clean and disinfected materials. Never eat sprouts that smell bad, are slimy or mouldy.
More Sprouting Information?
If you’re looking for more information on how to sprout certain beans, legumes, grains and microgreens, check out Sprout People’s growing instructions page. They go through many types of sprouts and include youtube videos for some varieties.
Live well, beauties
X
K
The post Sprouts & Microgreens: Why You Should Have a Little Garden in Your Kitchen appeared first on Living Pretty, Naturally.


